My MK1 Golf, Dilbert

Documenting my Mk1 Golf show car build

Monday, September 21, 2009

Car storage

Posted by marc keeley |

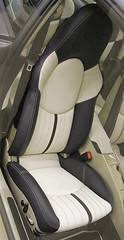
Unfortunately we haven't a garage and where we live ones to rent are as rare as hen's teeth. Obviously you don't want to leave your car out in the elements if you can help it so, after some investigating, we've pretty much decided to buy a Carcoon before Autumn sets in.

They make both indoor and outdoor versions, the outdoor version being aluminium coated double skinned and offers better UV protection. They are permanently hooked up to the mains in order to power a small fan that keeps the filtered air circulating which prevents condensation forming and so preventing rust (you keep the windows wound down to allow air to circulate inside). They estimate that it only costs around £10 a year to run plus filters. It has other advantages such as protecting it from cats and birds (and idiots who enjoy scratching cars), the UV protection prevents your paint from fading and it keeps dust and other airborne contaminants out. An added bonus is that it acts as a battery conditioner. So all in all seems like a good investment.

You obviously need a drive to put it on, don't think you could put them on the road even if you added reflectors but could be wrong. The downside, if you exclude the fact you can't do work inside them, is that they take a bit of time to get the car in and out and ideally it's a 2 man job. So it wouldn't work for a daily driver but that's not a problem in our case.

If you want to be doubly sure your car isn't damp then you could also buy yourself some silica desiccant, the same stuff as in those little bags that come with electronic goods, which will absorb moisture and a thermo-hydrometer to measure the humidity, you want to try and keep it below 50%. I'm guessing you'd want 2.5KG (2500g) of silica which absorbs around 60% of its weight in water, so about 1.5 lires of water. A smaller quantity would be fine it just wouldn't last as long. Neither are expensive and should only cost £35-£40 from eBay. The good thing about silica is that it can be reused over and over, just place in a warm oven for a few hours every few months (or when the humidity stays above 50%) to dry it out.

Saturday, September 19, 2009

Status report

Posted by marc keeley |

Just thought I'd say sorry to anyone who was expecting loads of progress photos. There will be plenty of photos when the time comes but we're really still at the planning/preparation stage. The aim is to be ready for the end of Spring which gives us enough time, with luck, to be able to spend this time upfront brain storming ideas until we come up with designs we really like. As is the norm we've spent countless hours researching and discussing ideas.

So here's a quick status report:

The leather hides have now been delivered so the basic interior colour is definitely tan. We still need to finalise the designs for the door cards and parcel shelf and decide whether or not to go tan for the head lining.

The Happich rear pop-outs have also arrived in their retro box!

My brother, James, has now moved house and will be setting up his shed so he can start the mirror polishing in earnest and relative comfort.

Saturday, September 19, 2009

Sewing

Posted by marc keeley |

I've been searching for a cheap industrial sewing machine but they've either been anything but cheap or local pickup only and too far away. The price for a decent one isn't cost effective for a single project. I could buy one and then sell it once I've finished but don't want to risk spending that amount of money and not being able to get rid of it.

So it looks like the retrim is going to be hand sewn. Obviously it's going to take longer but that has the advantage of being able to take more care (at least that's what I'm telling myself).

In preparation I've bought a chunk of sewing bits and bobs, overstitch wheel (marks where the sewing holes should be), awls (makes the holes), creaser (can be used to create guide lines), needles, decent scissors, scalpels (prefer them to craft knives), cutting board and sewing palm (grown up version of a thimble!). Still need waxed thread once its colour has been decided on, could either go tan or a contrasting colour, and some cans of 3M 77 spray adhesive. Then there will be scrim (fabric) backed foam but the design needs to be finalised first so we know what thicknesses we need.

You sew the leather to the scrim foam to create the creases known in the trade as pleats, the thicker the foam the more pronounced the pleat will be. This is called a pleated interior and the easy way to go about things, there is a more complicated way called tuck and roll but I don't think I'll be going that route.

Friday, September 18, 2009

Slight change of plan

Posted by marc keeley |


Leather
Originally uploaded by MK1Golf

We've had a change of plan with the interior colour, yes already. Well not exactly a change as it was one of the colours we really liked from the outset after seeing a couple of red hot rods with tan interiors. The second one with the purplish red paintwork is especially nice.

So I've bought 4 Connolly leather hides in a warm tan with a nice grain, so nothing like white we'd latterly been considering. Haven't decided yet whether to go all tan or mix it with dashes of perforated black to match the leather on the steering wheel.

I still like the idea of vertical padding so the basic design will remain the same, almost certainly, probably, perhaps...

I'm not sure about using it as headlining, might be a bit too much, perhaps better in cream, will have to think. If we don't use it for headlining but still have enough left then perhaps leather carpets instead?

I've been Google'ing like mad researching how to retrim but there isn't a whole lot of info out there on seats, however I did find this useful article. The site is worth signing up to as, although it's primarily hot rod related, there are plenty of nuggets of information you can pick up and use. I don't think the retrim is going to be easy and will probably regret starting but, hey, it's something different. You never know it might actually turn out OK!

Tuesday, September 15, 2009

Retrim idea

Posted by marc keeley |


Seat retrim idea
Originally uploaded by MK1Golf

Here's the current favorite idea for the retrim. I've used a picture of later Porsche seat as it was already black and white so the shape is a bit different. The top section would be smaller probably to flow in to the white "wings".

The idea of the central black stripe together with the padded sections (they're supposed to be creases in the padding not mini stripes) was to pickup the main lines from the GTI fabric. Not certain it's an obvious link but looks good.

I thought about red inserts but the black stripes might not stand out enough. However red is a sporty colour and things like the door cards could be made to blend in to the paintwork. Not sure.

If we decide to retrim the car then the plan is to try doing it all ourselves, including headlining which I thought would look good in white with a larger central black stripe. The top of the dash would be black, either in leather or carbon fibre, and the bottom white. Door cards and parcel shelf would also be done using the same theme. Should be fun as we have trouble darning a sock!

Sunday, September 13, 2009

Happich pop-out's

Posted by marc keeley |


Happich pop-out's
Originally uploaded by MK1Golf
I bought these today, a set of Happich rear pop-out's. MK1 versions don't seem to come up often in any condition never mind still boxed so I thought it was worth a go.
I'd decided that I wasn't going to bid an outrageous amount for them, if I won then great, if I didn't then I'd do without them. This isn't meant to be a blank cheque project, we want to work to a reasonable budget. So another thing to add to the "to do" pile of parts when they arrive.

Thursday, September 10, 2009

A German lesson

Posted by marc keeley |

If you need to look on eBay Germany for parts, as there's much more choice than in the UK, here is a list of translations I've noted down that should be of help. It's not exhaustive but gives you a good start. First though here are a few tips for buying from Germany.

  1. Not all sellers ship outside Germany, however they often seem happy to so ask before bidding.
  2. Not all take PaPal, unlike here German sellers are not obliged to allow PayPal payments. If not listed as a payment type it's still worth asking.
  3. Bank transfers, you'll normally be charged to transfer money to a foreign account. Make sure you know how much you will be charged before bidding as it may turn your bargain in to an expensive purchase. Another disadvantage is that it is harder to get your money back if anything goes wrong. Personally if I can't pay via PayPal I don't bother.
  4. Unless your German is a lot better than mine then you'll need to use a translator. If you're using Internet Explorer 8 select Page>Translate with Live Search from the command toolbar. If you're using a different browser then go to the Live Search page. You'll need to tell it that you're translating from German.
  5. If you need to ask the seller questions keep your english simple and don't use slang or abbreviations they're unlikely to understand or be unable to translate. It's not a good idea to send them the results of an online translator unless you're sure that it isn't jibberish. Send it in English, they can translate it if required.
Alternator = Lichtmaschine
Alternator bracket = Lichtmaschinen-Halter
Belt release wheel/pulley = Riemenspanner-Rad
Bolts = Sechskantschrauben
Bonnet = Motorhaube
Bonnet catch (top) = Motorhaubenverriegelung
Bonnet hinges = Motorhaube Scharniere / Motorhaubenscharnier
Bonnet lock (bottom) = Motorhaubenschloss
Bonnet struts (actually could be hatch struts) = Heckklappen- Dämpfer
Brake callipers = Bremssättel
Brake master cylinder = Hauptbremszylinder
Dipstick = Ölmeßstab
Distributor bracket = Zündverteiler-Halter
Distributor cap = Verteilerkappe
Door handles = Türgriffe
Door pins = Türpinne
Engine bracket = Motorträger
Engine mounts = Motorlager
Expansion tank = Ausgleichsbehälter
Filler cap = Tankdeckel
Gear knob = Schaltknauf
Grille = Kühlergrill
Handbrake = Handbremshebel
HT lead covers = Zündkerzenstecker
Hub caps = Felgendeckel
Indicator stalks = Lenkstockhebel
Instrument/dial rings = Tachoringe
Instruments = Armatur
Jubilee clips = Schlauchschellen
Mirror = Spiegel
Oil cap = Öldeckel
Oil filter bracket = Ölkühler Halter
Opening quarter window = Drehfenster
Petrol cap = Tankdeckel
Radiator = Wasserkühler
Rocker cover = Ventildeckel / Zylinder Deckel
Seal = Dichtung
Seal for opening quarter = Drehfenster Dichtung
Servo = Bremskraftverstärker
Servo bracket = Bremskraftverstärker Halter
Starter motor = Starter
Steering wheel = Sportlenkrad / Holzlenkrad
Steering wheel hub = Lenkradnabe
Sump = Ölwanne
Valve cap = Ventilkappen
Vent (air) = Lüftungsgitter
Water pump = Wasserpumpe
Wing (fender) Screw = Kotflügel Schrauben
Wiper arm = Wischerarme

Subscribe